|
Clearing a media jam
|
|
Note: If the printer has frequent media jams, clean the printer regularly; see Caring for Your
Printer.
At a glance
If a media jam occurs, the front panel reports Clear <Location> Jam. These are the types of media jams that can occur:
- Exit jam
- Internal jam
- Entrance jam
- Fuser jam
Overview
For any media jam, clearing it consists of these basic steps (for complete instructions, refer to Clearing a media jam):
- Cut the media, if necessary (roll media).
- Open the top cover and use a pen to move the printhead to the far right.
- Open the exit cover and move the fuser to the side.
- Remove the jammed media from either the exit or top paper path.
Hints
- If media is not loaded and the front panel reports a media jam, open the top cover and close it again to clear the error message.
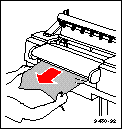
- Whenever jammed media extends from the exit path, remove it from that location with a downward movement. Pulling media in the same direction as the paper path leaves less residue inside the printer than backing media out of the printer from the drum area.
- After removing the jammed media, inspect the inside of the printer for loose pieces of media and remove them.
- If the printer frequently reports Clear Entrance Jam, make sure that your media cuts are smooth and that you insert the media evenly; see Cutting roll media.
Clearing a media jam
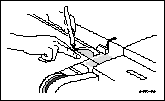
- Cut the media if you are using roll media. If not, go to Step 2.
With the paper roll cover open, use a sharp knife (such as the cutting tool included with the printer) to trim the jammed media. Use the printer's cutting guide to make a clean cut.
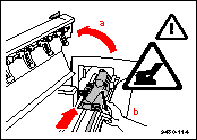
- Move the printhead.
- Open the top cover.
- Using an object such as a pen, move the
hot printhead to the far right. If you do not
do this, you might damage the printhead
when you remove the media.
Warning:
The printhead is hot. To avoid injury, do not use your hand to move the printhead.
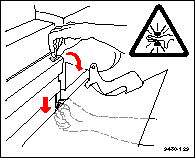
- Move the fuser.
- Open the exit cover.
Warning:
When lowering the exit cover, be careful not to
pinch your hand between the paper roll cover
and the exit cover.
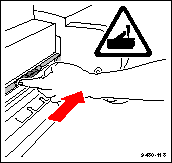
- Move the fuser to the far right or left side of
the printer.
Note: This protects the fuser and releases tension between
the fuser wheel and the media; it also moves the cutter
away from the jammed media.
- Remove the jammed media. For all types of media jams, always inspect the drum and rollers for any loose paper and remove it.
|
If paper extends outside the exit cover:
|
OR
If paper does not extend outside the exit cover:
|
OR
If paper is only visible inside the top cover:
|
|---|
- Close the exit cover.
- Gently and evenly pull the media out of the exit path.
|
- With the exit cover open, remove the jammed media.

|
- Pull the back tension blade's handle toward you and hold it in that position; this lifts the blade away from the drum and releases the jammed media.
- Remove the media by pulling it out of the printer.

|
|
| |
|