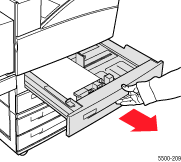
Pull out the tray specified
on the front panel.
Verify that the length
and width guides are pressed against the paper.
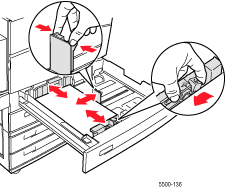
Push the tray completely
into the printer.
Specify the size of the paper:
In the front panel menus, select Printer Setup, then press the OK button.
Select Paper Handling Setup, then press the OK button.
Select Tray 2 Setup, Tray 3 Setup, Tray 4 Setup, or Tray 5 Setup, then press the OK button.
Select Auto Sensed, Custom, or a listed paper size, then press the OK button.
If you selected Custom, specify the width and height of the paper. Select Custom Width, press the OK button, scroll to the width of the paper, then press the OK button. Select Custom Height, press the OK button, scroll to the height of the paper, then press the OK button.
Open Door A.
Caution: Use
caution; some components inside Door A may be hot.
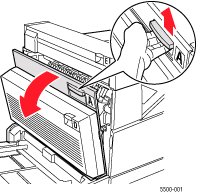
Pull the jammed paper
out of the printer. If necessary, press the green handle to release the
paper. Confirm that all paper fragments are removed.
Close Door A.