Printers & Supplies
Solutions & Services
Customer Support
Partners
The kit consists of these items:
Filter
Blower/brush cleaning tool
Caution: When replacing the imaging unit, make sure that you do not expose either the new or used unit to light for more than 45 seconds. (When diagnosing a print quality symptom, you may replace the imaging unit and find it was not the solution, and then need to put the original unit back into the printer.)
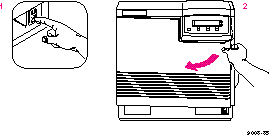
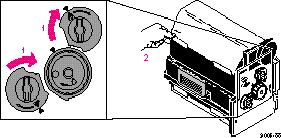
Open the front door.
To unlock the imaging unit, turn the large blue knob counterclockwise.
Holding the blue front handle, pull out the imaging unit until it stops.
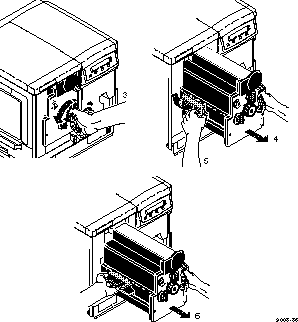
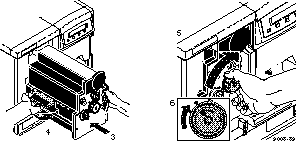
Lift up the blue handle on the left side of the imaging unit to release the catch.
Caution: The imaging unit weighs about 6.8 kg (15 lbs.); take care to handle the imaging unit as shown to avoid damage to the unit and personal injury. Slide the imaging unit out all the way; cover it completely to prevent damage from exposure to light, and set it aside.
Caution: The imaging unit weighs about 6.8 kg (15 lbs.); take care to handle the imaging unit as shown to avoid damage to the unit and personal injury.
Save all packing material in case moving or subsequent shipment is necessary.
Caution: To ensure print quality, do not touch the underside or the right side of the imaging unit; you may see fingerprints on your output. Never allow exposure to direct sunlight, which can cause permanent damage in only a few seconds. Do not leave the imaging unit exposed to any light for more than 45 seconds. If you do, the unit may be damaged and need to be replaced. When installing it, leave the protective cover on until immediately before you insert it into the printer; then, promptly close the front door.
Insert the new filter.
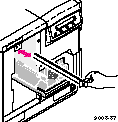
Remove the protective plastic sheet.
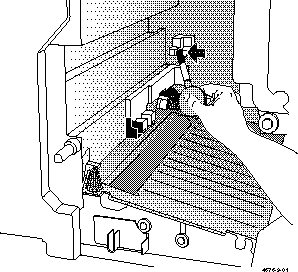
Insert the new imaging unit into the printer, holding it by the blue handles.
Release the left handle and slide the unit in until it stops.
Turn the large blue knob clockwise to insert the imaging unit completely and to lock it.
When properly installed, the lock icon aligns with the black triangle.
Close the front door and turn the power on.
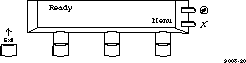
Help Pages

<---    --->    Menu
Press the right arrow button (--->) until the display reads
System Counts

<---    --->    Menu
Press the Menu button to enter the System Counts menu.
Imaging Unit

<---    --->    Menu
Press the Menu button; then press the Reset button.
Corona Wire

<---    --->    Menu
Press the Exit button until the display reads Ready.
If the new imaging unit did not take care of the symptom, put the original unit back into the printer and repack the new unit so that it is protected from any exposure to light, and save it for future use as needed.